填坑
时隔两年,又开始写总结啦,这两年虽在谷底,但是心境上又更上一层楼,看到了不一样的风景。
回顾 2020-2021
工作篇
总的来说这两年都在不断的重复,而过程不大一样。在18、19两年经历了大起大落后,又经历了逐渐萎缩,逐渐消亡的过程,这经历也是弥足珍贵;而我,通过自己动手也找到了更适应变化,更适合小团队的方案。
2020
不得不说的是,在疫情的突然来袭,所有人都手足无措,不过还好,并未出现崩溃式的问题,优秀的人仍然做着优秀的事情,而“普通”工程师依然在想法子摸鱼。
历经半年的磨合,和小团队的几个人算是有了不同的了解,只是对人性还是有所迟疑。该来的还是来了,该发生的还是发生了,虽然无法探究背后是否是人为操纵,但从最后的结果来看,应证了我的想法。在地狱的人们是看不到光的,也不要尝试把光照进地狱,想想自己不被拖入地狱就够了。
最终,还是逃离了北京,本不属于北京,也从未尝试融入,在最后的时间里每一分每一秒都是煎熬,我很棒,做出了很棒的东西,下面的人理解不了,上面的人理解不了,算了不合则分。究其原因还是在我,太过于没有耐心,太急于求成,想在短时间内达到一个更高的境地,毕竟不是人人都是我这样的,未必人人都可以看到我看到的风景。
2021
回到重庆,选择和熟悉的人一同工作,回到熟悉的领域来,算是开倒车么?不过熟悉的领域还是更加适合我,只是这次的条件真的不同,基础差,看到的是满目疮痍,难道又要坠入阿鼻地狱么?
这一年从两个点上发力,同时形成了一整套打法,特别值得分享,虽未必适合所有人,但是可作为参考,特别是这种类型的团队,典型问题的典型解决方案。
两个点,一是渠道能力,逐步重构;二是基础技术组件,逐渐重写。
为何是这两个点呢?
- 渠道是支付公司的命门,只要这里管的好,是一切业务问题的根源。
- 基础技术组件,不可出错,为防范“普通”工程师,有力的手段。
具体更多的手段如下:
一、团队篇
1、人员结构调整
- 引入能力有差异化的同学,而非平铺靠人天去完成工作,工程师应该是一个脑力工作者,而不是搬砖者
- 一个优秀的工程师在当前的效率明显高于“普通”工程师,同时优秀的工程师对未来的思考是“普通”工程师所不能及的
- 劝退“普通”工程师,节约下来的薪资用于优秀的工程师,优秀的工程师值得更高的薪水
- 人员减少,人员数量的减少显著降低团队管理成本
2、人员能力重塑
- 在团队内部推行岗位模糊化,即每个人都该具备相同技术栈,可以不精不能不会
- 开发的同学具备基础测试能力,对质量的持续要求,进一步解放测试同学在基础测试工作上的压力,使得测试同学可以做更多对团队更高价值的事情
- 引入“开心果”,在选人的时候注意选择性格更开朗的同学,使团队告别“寂静”的氛围,缓冲各种可能出现的矛盾
- 产品经理更是综合岗,而非专业岗,特别是在非专业产品经理的身上,肯学肯干的素质更重要
3、绩效考评
- 从结构上,技术团队的考评可以做到灵活和固定相结合,可以设置固定的绩效标准,也可以针对某个重点工作设置具体考核标准
- 从习惯上,技术团队的工作日志,被如实记录下来了,使用团队管理工具可以快速掌握团队当前工作情况
- 从结果上,技术团队的考评可以做到全面数据化
4、文档
- 收集整个团队的文档,分门别类,记录到版本工具,强推Markdown,更简单的格式,更方便的管理
- 不过依然有人理解不了,有些时候透过这些小事情依然可以检验出什么样的人是你想要的人
二、产品篇
1、新增产品
- B2B业务
- API业务
- 引入平台型合作伙伴概念
- 平台型合作伙伴是直接的引入客户,同时完成客户整个收款、清算生命周期
2、PCI DSS
- PCI自查
- PCI DSS机构审查
- 业务系统遵守PCI关于银行卡管理要求
- 服务器遵守PCI关于服务器管理的要求
三、技术篇
1、自主可控的基础组件库
- 通用工具类
- 三方资源:短信、邮件、钉钉等
- 工程管理
- 针对老系统和新系统不同版本的组件库
2、构建更灵活、更集约化的新系统
- 当前服务于B2B业务
- 逐步覆盖老系统的其他业务
- 资源占用大约是老系统的1/3
- 系统执行效率大约是老系统的5倍
- 系统的稳定性和可测性有迹可循,提供了现代系统的全套DevOPS能力
- 采用全面组件化,可以像现在一样集成在一起部署,亦可以未来有一天拆开成为微服务系统
3、运维调整
- 提升数据库性能大约是之前的5倍以上,成本相差不大
- 降低整体服务器成本约为上一年度1/2,计划在2022年度降为2020年度的1/3
- 大幅提高系统发布效率,已做到人人可发布,时时可发布
正在试用新工具(Maven Deamon)大约提高1/3发布效率
- 自我优化后,人力成本约为最初的一半,哈哈哈哈
生活篇
2020
大约有一半的时间在北京,看着萧瑟的树枝,吹着刺破脸庞的寒风,想着自己住在20年前的宿舍,更是笃定自己不属于这里;初到北京用Mac电脑完成工作,失去了游戏真是非常难熬,有那么多的夜晚无聊到继续工作,也会增加对自己的恨,为何会越活越回去了。
后期,老板大气买了可以玩游戏的电脑,心能沉一点;随着同事朋友的离职,自己对于工作的无力感,终于还是压垮了我。
就是那句话“你这样和XX有和不同”,我心里想能说出这话真是10年脑血栓患者啊。
罢了,罢了,我努力学习,努力工作不就是为有一天可以对任何事Say No么???
我还要坚持是我,没啥好改的,也没必要,我虽然认为我是最优秀的中国人之一,在逐渐劣币驱逐良币今天,我还是会坚持,虽然傻,傻就傻吧。这杯苦酒自己吞,这何尝不是上天对我的考验呢。
2021
回到重庆,小公司嘛,在基础设施上也是……和我认为的“小公司”不一样,之前还会对很多东西提提意见直到有一天说到关于工位太窄了,老板说“字节跳动的工位标准是80CM每人”,虽然俺也没能找到佐证的材料,但这就是态度了,以后看到更加有趣的现象也不觉得“有趣”了。
哎呀,明明该讲生活上的事情了,怎么还是在吐槽工作,哈哈哈哈……
这一年,我吃自助餐次数和金额大幅减少,体验过了,还是喜爱,要克制。
这一年,花钱买了几个游戏都很失败……帝国神话、部落与弯刀,玩的多的还是PUBG,还在和朋友一起与孤儿作斗争,也真是想不明白孤儿为何会成为孤儿,是真的不喜欢爹妈的爱么。
这一年,犹记得被小水枪支配的恐惧,下一年还是买个M4啥的对冲一下。
这一年,去了趟贵州,虽只有几天而已,过程也是踩坑不少,对我来说每天都很舒服,离开电脑,离开工作就很舒服。
这一年,恢复足球运动,在年底一次大伤,已经2个月了还好不了,膝盖扭伤,该不会直接导致挂靴吧,我的新鞋子也不答应。
这一年,回去一趟易极付,回去那个禁地,虽已物是人非,走后还是难过,曾经熙熙攘攘的地方,突然安静了下来还是很失落。
这一年,QQ音乐到期了,转投网易,用老婆的账号,她怪我污染了她的日推,那没得法。
这一年,重庆话逐渐提高,为成为一个有归宿的人,一个会说方言的人,也是很努力呀……是不是该考虑入籍问题了,毕竟小孩子也要入籍呢。
这一年,逐步淘汰手机的使用,有点反潮流,手机的性能对我来说完全是浪费,不打游戏,不拍照,似乎手机的90%的价格都是浪费了,大概想要换个足够小的国产手机了。
这一年,逐步用回Windows了,无论是工作中还是生活中,Windows比10年前要稳定多了,虽然偶尔还是要抽风,但是好多了,好多了。真想在工作环境用回Linux,久违了啊。结合上一条,这样可以完全抛弃水果公司对我的控制,自由的呼吸自由的空气,真好。
这两年,见识了西方世界的光怪陆离,才更加理解自己国家的好,才更清醒认识到华夏文明几千年积攒下的尽是智慧。
这两年,思想进一步被改造,想为了这个新中国做点什么,想为了这世界做点什么,改造自己的同时,是不是可以考虑改造环境了,在另一篇文章里有专门阐述。
这两年,优秀的国产产品越来越多的走入我的视野,在生活中占据了90%的生活。
这两年,看了大量的影视剧作品,其中《功勋》、《觉醒》是决不容错过的佳作,关于那段历史,关于那些一个个的人物,以史为鉴。
这两年,不但恢复了代码能力,也在不同的时期学习新的东西,学习能力也在提高,最近又开始学习Rust、Flutter了,Rust的语法真不是人学的。
Recommend
推荐不分顺序,后续也许会有更新。
- 音乐
- 《海底》via 凤凰传奇,原版的海底听的人极其压抑,听完凤凰传奇的版本有种被救赎的感觉,结合这两年抖音上正能量的视频更有共鸣
- 《哢春生》via 斯斯与帆,和两年前《马马嘟嘟骑》一样的风格,一样的感觉,棒棒
- 游戏
- 《2077》:可以玩玩,即便bug多多,依然值得玩,切勿人云亦云
- 《永劫无间》:一个现象级游戏,我试过,我不适合
- 《僵尸毁灭工程》:一个我关注的B站UP主力推的游戏,2年前觉得画面渣看不上,现在真香,游戏性才是真的
- 电影
- 《怒火·重案》:只为谢霆锋也值得看,反派帅成这个样子也是该死,哈哈哈哈
- 《硬汉枪神》:创意不错,没拍好
- 《长津湖》:没得说,太好了
- 剧集
- 综艺
- 《一年一度喜剧大赛》,最初的几期有点傻,算是渐入佳境吧,期待下一季,也很有可能是翻车的下一季
写在最后:
其实,如果要让我写今年的总结,我只想写这一段而已。
今年的香港的事儿,在国内大面积爆发出来前两月就知晓消息,以为不过是和往年一样,谁料到居然搞成这样。
这件事和《我和我的祖国》的上映,70周年的庆典,让我这个常年愤青180度大转弯。覆巢之下岂有完卵,你折腾什么!!!不爽的,请滚出中华人民共和国的国土,还我国土,还我香港。
难道如今的中华人民共和国不是过去几十年发展最快的国家么?难道不是你我参与的这15年的爬上世界顶峰的么?有谁敢站出来说老子可以比中国共产党做的更好?管理如此大的一个国家那得是多大的智慧?当年国共合作打跑日本人的牺牲和今天的牺牲哪一个更重要,谁又说的出来。
我爱国我没错,即便我爱的国家、承认我的国家有那么多毛病,我们该做的是让她渐渐变好。当没有收集到那么多的信息的时候不要一上来就否定国家的国策,国家的政策。我们该做的就是执行好,做好,别填堵。有力出力。如今,我们可以拥有现在安定繁荣的生活,哪一个不是国家给的。
“哪有什么岁月静好,不过是有人替你负重前行。”
写于办公室
2020.1.1
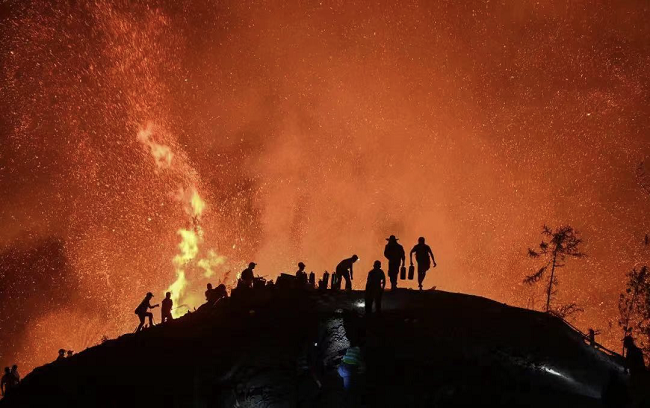
题图:来自网易新闻